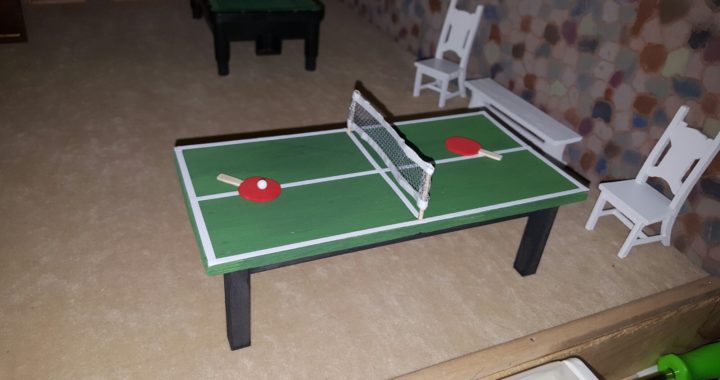
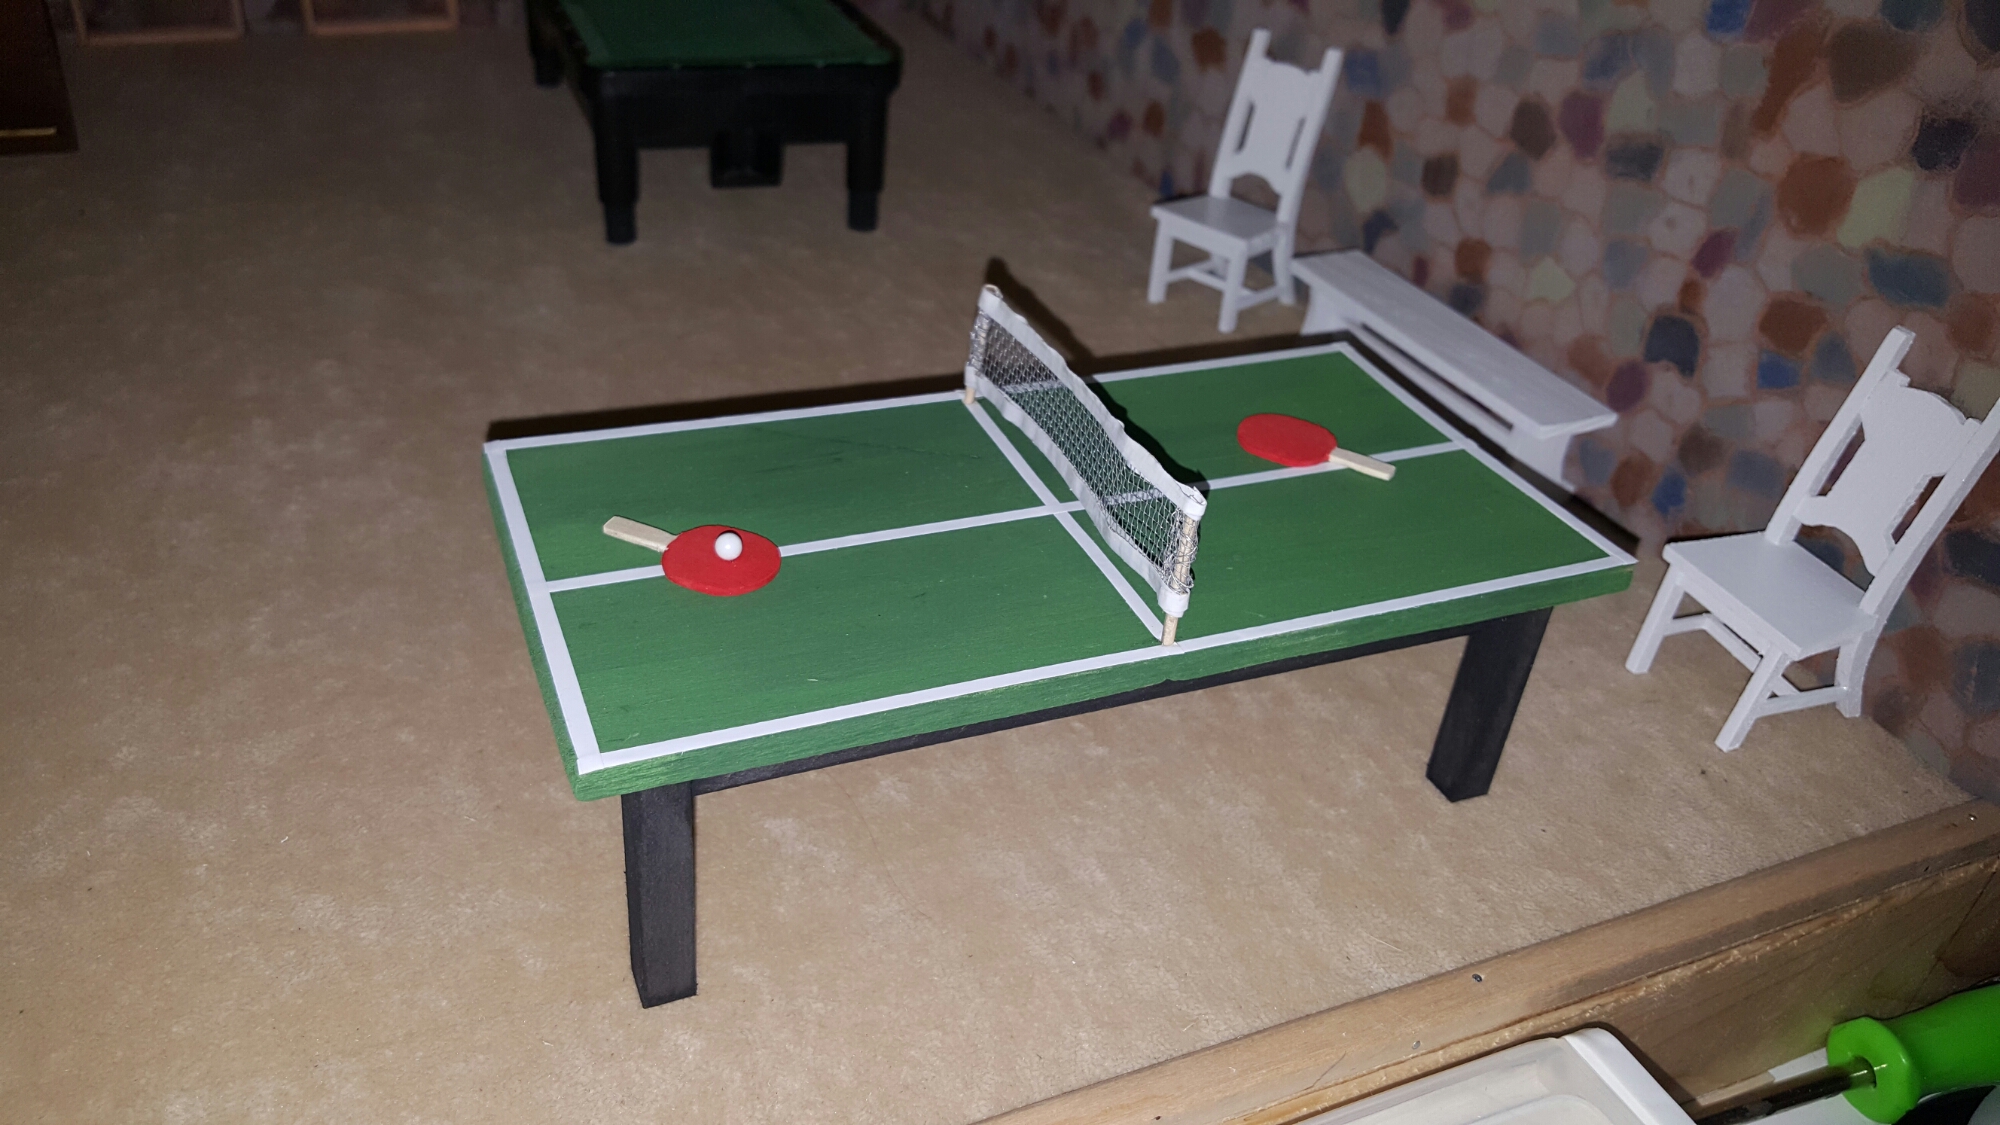
So much fun and super easy to build.
Check out the tutorial then download the free template from my website.
New templates are added and updated weekly
Video Transcript
0:00
hi guys welcome back today I’m going to show you how to make a ping-pong table
0:05
first one I do is get the template off my website and cut all of the pieces
0:11
once you have the pieces cut then you want to take your large board and you
0:16
want to paint it going
0:18
let it dry completely
0:22
once it’s completely dry then you can work with it now these pieces here
0:29
you’re going to use the wooden dowels that are square and you’re going to cut
0:35
them and then the smaller pieces are going to be your end and the larger
0:39
pieces are going to be the sides
0:41
ok so as you can see how i have shown to you this way before I played together
0:49
how I have this even with this
0:51
that’s what you want to do and then this side is going to be even with the edge
0:57
here you wanna make sure you’re gluing that right at the corner that way this
1:01
sticks out and if you’re bored has a rounded edge like for some reason they
1:07
round at one side of this put that facing up on the outside bottle that way
1:14
you can get a completely square
1:16
alright so the next thing you are going to want to do unless you want to paint
1:21
your lines get yourself some car tape this is like the penn street that goes
1:26
along car
1:28
it says pro stripe this is 18 inch and they have it in one thirty-second which
1:34
have to order that online but you basically can pull it apart and then
1:39
tape it where you wanted to go again all also uses for windows so you want to get
1:46
that so you have your striping and then you can mod podge over top of it if it’s
1:51
not sticking properly
1:52
alright so now you want to put glue on your one side piece and then this the
1:57
under board this goes underneath of your table
2:03
well underneath your tabletop i should say make sure you’re doing it on a flat
2:08
surface glue that there then you’re going to take this one and glue it here
2:18
make sure it meets with the corner of here though don’t have it like that
2:22
because it’s not how it’s supposed to be ok now you want to do the same thing
2:28
with the side piece here and you want to do the same thing with the bottom piece
2:33
here and glue them on their make sure you have the edges all right now you
2:37
want to put a little bit of glue on the inside corner of your Dow and then
2:43
you’re going to attach it to their
2:53
you want to do that to all four sides for all four corners right now they’re
2:59
going to rest up against the side pieces and glue into there and then i’m going
3:03
to put a bead of glue around here just to help secure it you don’t need to but
3:06
I want to just to make it extra secure
3:19
and then you want to let that dry for at least two hours before you go messing
3:30
with it because if you mess with it before then it’s not completely dry you
3:34
end up with legs that are wonky right so i took a popsicle stick and I had it
3:40
flat or cut flat and I just kind of went around and pulled out the excess that
3:45
way it’s only in that thin corner next thing you’re going to want to do is
3:57
you’re going to want to masking tape it around so that you can be sure to keep
4:03
these nice and snug until they dry
4:05
ok so to make your net you want to take a piece of screen and then you want to
4:12
cut it and then what you’re going to do is take the extra piece of screen you
4:16
have left over and you’re going to pull one of the strands out of it and then
4:20
this is where you’re going to take this and you’re going to feed it inside of
4:26
here like your sewing
4:33
no more you want to go around it constantly until you get to the end
4:51
probably about 10 times and then bring it back and i’ll show you how to end it
4:57
ok so once you have it what you want to do is you want to take the beginning
5:02
peace and the end piece and you just want to twist them together and then
5:12
once you have a twist it cut that off and then put some guerrilla krazy glue
5:17
wanted
5:21
alright so now i’m going to just attach the guerrilla krazy glue right down in
5:25
here and let it dry and these are just little round wooden dowels that come in
5:34
the craft section also going to put a little bit on the top here
5:49
and a little bit on the top over here now you want to stick it in something
5:55
like floral foam or styrofoam until it dries that way that you can keep it
6:00
where you have it
6:02
ok so this is dry enough that i’m gonna paint it normally I paint my projects
6:07
when i’m done but this is something you want to paint before you do the rest of
6:13
it because it’s going to be really difficult to try and get this paint it
6:17
without hitting the top of the other one and i’m just using some acrylic you can
6:23
use some latex if you like and it will take multiple coats and you can paint it
6:28
whatever color you want to paint it too
6:37
yeah
6:39
be careful because it will come out in the blob if you squeeze it too hard like
6:44
it did for me so just kind of try and working it around everything
6:57
try not to get anything on this area here because that’s where we’re going to
7:02
be gluing the top two
7:07
ok so it should look kinda like this once you have it paint it now you can
7:12
add more pain if you want I only did one coat because I wanted to see the wood
7:15
green and that’s all I’m going to do now i’m going to go ahead and put some glue
7:23
on the corners along the edge and then some in the middle and then we’re going
7:46
to attach the tile know that then you want to measure it and flip it over well
8:09
okay so now we went ahead and Mark where we’re going to put our holes and were
8:13
cutting deafen we’re cutting the bottom of this brown douse that the net is
8:20
attached to so that we can actually put them in their forgotten pre drill our
8:26
hole just very gently
8:32
and then you want to put a tiny bit of glue on here and then we’re going to
8:47
insert them in here
8:50
ok so now i’m just going to go ahead and put them in there put a little bit of
9:03
glue on the whole if you didn’t make your holes exact you can always adjust
9:07
your screen just a little bit by just turning it in word or outward and it
9:14
should work now the next thing to do would be to put the sticker on that’s
9:21
going to cover the line
9:23
ok so i’m putting into the very very edge you’re completely completely on the
9:32
edge
9:36
now i’m leaving it access over until I’m completely done then i’m going to cut it
9:44
off and once it’s one here if you’re gonna mess with it any you might want to
10:02
put the Mod Podge on top of it to give it that extra security in place so now
10:18
i’m just going back and I’m trimming up my edge
10:23
and then I’ll finish up the lines
10:39
ok so this is what it looks like now I went ahead and put some tape at the top
10:42
and at the bottom
10:43
however I used duct tape and i just cut it for that so it would be better sticky
10:47
added some more glue there you can go back and paint this part if you want but
10:59
it’s not necessary
11:01
that’s the ping pong table
11:23
Dana I took one of these jumbo popsicle sticks or tongue suppressors and I turn
11:29
them into ping-pong paddles my come on the bandsaw but they’re thin enough that
11:35
you probably could just cut them with a pair of scissors
11:52
ok now if you want to create a ball you can get yourself on map pins
12:02
and then what i did was i stuck it through there so it doesn’t fall off and
12:09
then i cut the end off but you can cut it completely off and just have like a
12:15
little ball if you like
12:17
all right don’t forget to Like and subscribe below so that you can see more
12:21
and follow my website under doll house manager Manus and tutorials as well as
12:27
my facebook page for lots of images of the projects that i do and my dad helps
12:33
me with all right thanks a lot have a great day
12:54
ok guys thanks for watching and don’t forget to follow doll house manager
12:59
madness and tutorials com also check us out on facebook dollhouse measurements
13:04
and tutorials and on youtube like and subscribe to the channel because we post
13:10
videos all the time and leave a comment question or suggestion because we love
13:14
hearing from you and if you like Pinterest we have tons of pens on there
13:19
as well under laurie holden Heisler I thanks a lot have a great day